Small Space Nursery

Not sure what it is about my babies and closets, but my daughter and now my son have had their nurseries in my closet. I guess it started because at 5 months pregnant with my daughter, we got the news that the company my husband ran with his father was done, and, because of some bad tax advice, not only did he not have a job, we owed in back taxes. We had no choice but to move in with my parents. It was definitely a hard season of our life, but one that we learned a lot and grew stronger as a couple.

I guess there is just a stubborness (probably if you asked my husband, he wouldn't guess, he would know) inside of me. I determined that in spite of circumstances I WAS NOT going to lay down and allow life's circumstances to rob me of what I thought were necessary things: a nursery and decorating for a baby. Now on my second child, I can tell you it was the hormones talking. These are not necessary, but they sure make a woman feel better. I smile to think that one day my kids may grow up and laugh about being placed in the closet, but I have the proof in pictures that I made the most of it. You can't deny this momma's love or her desire to give her children the very best. I hope I teach them how to LIVE (not just survive) through the trials of life.

The closet was a perfect space for an infant: close enough to mom and dad to hear baby's cries, close enough to be very convenient to answer those cries, just far enough away to not be kept awake by baby's breathing, most come with doors if you need a sense of privacy, and everything you need for changing, swaddling, diapering, etc. is in arm's distance. I am now a closet-nursery advocate!

Adelaide's Nursery
I liked the nursery in my closet so much I decided to do it again. I won't say I LOVE it. I would LOVE a closet all to myself (a girl should be allowed this small piece of selfishness). If I had a third bedroom, my baby would have been put there. But when faced with the choice of placing my baby in his sister's small room on the other side of our place or in our large closet. I chose the closet. So, no, I will not take offense if you opt for a "normal" nursery, BUT, if you are faced with small space issues or trying times, the closet is a great option... an option I LIKE.
The Changing Station with my custom wall art from past project and changing pad cover from a project I have yet to blog.
Jedidiah's Nursery. It's a little less "decorated" than his sister's, but this one has to function as our closet, his closet, changing station and sleeping space. A lot of function for a 4 1/2x11 closet!
 Small Space Nursery Suggestions:
  • Think Function. Use the Rods in the closet for your baby's clothes (or your clothes). Use the shelves for storage (though I recommend not placing anything on shelves above where your child sleeps... at least not anything that could potentially fall and hurt your baby).
  • Hanging Shelves. Brilliant canvas shelves that hang on closet rod. It's where I keep all my cloth diapering supplies. I got mine at Babies R Us but I have seen them in the closet organization sections of Walmart and Target.
  • The Mini-Crib. They are the same size of a portable crib (the length of a twin bed headboard and a little over half that in width). It should last your child until they are 18-24 mos. (and if your child is anything like my daughter you will have to switch to a toddler bed at some point during this time anyways simply because she keeps climbing out of the crib.) Only downside to a mini-crib, there are next to no cute bedding options (I didn't have a hard time finding plain fitted sheets and bumper pads, but there is not much variety in the way of sets). The mini-crib can be really cheap or even come made to last and grow with your child like some full-sized cribs do.
  • Lingerie Dresser. Because these bad boys are skinny and tall, they take up very little space and are just the right size for tiny baby clothes. We redid a funky one from the 70's. We replaced the drawer fronts by making new ones out of MDF board, painted it, and put on some new drawer knobs that my mom and I hand-painted to go with the farm theme. (Because these dressers are so tall they need to be strapped to wall when your baby starts to cruise to prevent it from falling over on your child. We just screwed a scrap piece of 2x4 to the wall and then screwed the dresser into that.)
  • Dresser with changing table on top. I thank the Lord for this everyday. I made the lack of a dedicated changing table work with my daughter (we just kept a travel changing pad handy near her crib and used that until we had to lower the bed, then we used the floor and changing pad). But if you have the extra bit of space for a dresser that is a large enough to put a permanent changing pad on top and diapers nearby... DO IT!
  • Keep wall colors light. You want a nursery not a dungeon or cave. A closet easily can feel like that if you go overboard on the paint colors and wall decor.
  • Curtains. Ikea sells a track curtain system that can be placed on the ceiling if the closet isn't an option and you want a dedicated space for baby. We spent 9 months in a 400sq ft studio apartment with our toddler and it's how we made it work. I told Adelaide it was her princess bed... she loved it. (By the way, I found inexpensive fabric that worked great at blocking light, and then dressed it up by buying an extra sheet from her bedding set and adding it to curtains as an accent. I think it cost me $40-$50 with the fabric, the sheet, and the track system)  I think it's important to find a way to dedicate a space for the baby, mostly just so that mom and dad have a space that is their own.
Addy's Princess Space in our tiny studio apartment. I wish this picture showed the track system... but I am sure you can check it out on Ikea's website or at your local Ikea store.


 I think the point behind all of this, is to make the most with what you got. Don't fret, momma, because circumstances and space limitations don't match your ideals for your baby. You want your child to have the very best, but I promise you the "very best" you can give your child is your love. Chances are, if you are looking on the internet for how to make your small space special for your baby, you already have that going on.


Best Wishes to You and Your Family! 

Oh! And I would love to see pictures of your "small space" nursery!

Banana Blueberry Breakfast Muffin

I think it's important to set this muffin apart as a breakfast muffin. While I suppose all muffins are supposed to be for breakfast, as a former employee of Marie Callendar's, I'm sorry but a decadent lemon muffin topped with cream cheese frosting should better be classified as dessert (in fact, I think all their muffins should probably be considered dessert muffins... not that I am putting them down. Dessert muffins are good. Marie Callendar's are REALLY good). Point being, muffins are amazing, but not all muffins are packed with that wholesome nutrition (you know, high in fiber and packed with whole grains and vitamins) to start your day off right.

All muffins are not created equal.

I may have lost your attention at "high fiber" but let me tell you this muffin is tasty enough to eat for dessert (truly) but healthy enough to feel good about (and give to your muffin-loving kids for breakfast without worrying for their teacher's sanity during their Krusteaz Blueberry Muffin sugar high. As a former 5th/6th grade teacher, I feel very free to knock on the boxed muffin mixes... at least on schooldays).

Look at it. 

This BREAKFAST Muffin is BEAUTIFUL. Think Banana-nut bread married to a blueberry muffin. YUM!

I originally got this recipe from Chicita Banana (and made some changes) in an effort to find a place to put the bananas that my husband asked for but failed to eat. Pet Peeves: 1. brown bananas on my counter and 2. throwing uneaten fruit away. Sometimes I think he doesn't eat his bananas on purpose, just so I will bake something with them. That's okay, sweetheart, I do like baking.

Banana Blueberry Breakfast Muffins:

Ingredients:

The Muffin:
2-3 whole Bananas (brown)  
1 large Egg, beaten
3/4 cup low-fat Buttermilk
1 cup Flour (or 1/2 cup flour and 1/2 cup of wheat germ***)
1 cup rolled Oats (old-fashioned or quick cooking will work too)
3/4 cup (packed) Brown sugar
1 tsp. Baking soda 
2 tsp. Baking powder
1/2 tsp. Salt
1/2 tsp. Ground Cinnamon
1 cup Fresh Blueberries (or fully thawed frozen blueberries)

The Topping:
1/4 cup Rolled Oats (old-fashioned or quick cooking work too)
1/4 tsp. Ground Cinnamon
1 Tbsp. (packed) Brown sugar 
 1Tbsp. Butter, melted

Instructions:
1. Preheat Oven to 400 degrees. Line muffin pan with foil liners

2. Combine all topping ingredients except butter in a small bowl. Add melted butter to oats mixture and toss with a fork till well coated. Set Aside.

3. Mash bananas in a medium bowl. For a quick mash, try using your potato masher. Add in egg and buttermilk. No buttermilk on hand, no problem. Make sour milk. 3/4 Tbs of vinegar into measuring cup and fill the rest with milk until 3/4 cup line.
4. In a large bowl, combine the rest of the muffin ingredients except for the blueberries.

5. Add banana mixture to large bowl. Stir until just combined. Don't overstir. Overstirring causes muffins to be tough.

6. Fold in Blueberries.

7. Spoon mixture into muffin tins. Add topping to the top. Place in middle rack of your preheated, 400 degree oven for 20 minutes or until a toothpick inserted in center of muffin comes out clean.

This tasty batter is ready to go into the oven and make my house smell yummy.


It's my picky preschooler approved!


A perfect pairing for preschoolers: Brainfood muffins and Laura Numeroff's If You Give a Moose a Muffin.

Why I Love Wheat Germ:
***I need to take a moment to tell you about the wonderfulness that is wheat germ. Sounds gross, like, hello, we try our best to keep our kids germ free! But seriously, name aside, this stuff is awesome.  Wheat germ is the reproductive part of wheat kernel (hence the germ in the name: think germinate, not bacteria). It has a subtle sweet and nutty flavor (even more pronounced and wonderful when toasted), and its packed full of protein, folates, vitamin E, potassium and iron. It is healthy that tastes better! Best part is, I can sneak in some nutrition on my green-food fearing daughter (nutrition that tastes like it belongs there... yep, I have so tried to hide green beans in her bites of mashed potatoes... fail!) I find wheat germ in the flour/baking section of my grocery store, but some carry it in the health foods section.  You can substitute 1/2 cup of wheat germ for 1/2 cup of flour in any bread recipe. Try it!!!


Chiquita Banana has tons of other delicious and healthy places to put your extra bananas on their website http://www.chiquitabananas.com/Banana-Recipes/index-best-healthy-recipes.aspx

Saturday Mornings...

I love to cook. I love to cook for people. It makes me happy making people happy. Fortunately for me, I married a man that loves to eat. He feels loved when I create in the kitchen. We are a winning combo if I do say so myself.

So, enter Saturday mornings... Husband worked hard all week, I had the kids to myself save but those few glorious moments of shower time when Mike read Addy her bedtime story and Jed slept. We had high moments--Addy learned to count a little higher, Jed made precious sleep smiles, Dad got an extra job put on his route and therefore made more money. We've had low moments-- Addy's potty training accidents, Jed's irregular feeding schedule, not getting a minute to myself, or Daddy working late. Saturday morning is REDEMPTION. The chance to do things as I wish I could always do them. The chance to not run out of patience, the chance to enjoy my kids with my parenting partner and best-support-a-girl-could-ask-for present, the chance to not set the food on fire because Addy had an accident on the carpet, Dad was working really late, and Jed needed to eat all at the same time (yes, i have so been there, but don't worry, if you are taking cooking tips from me I don't ALWAYS set the food on fire. haha) Had Adam and Eve not sinned, this is what I imagine every morning would look like.

I wake up (usually when the munchkin has found her way into my bed and keeps asking "'Wake, Mom?" Seriously, Addy, if I answer you, I AM awake). I enter the kitchen and make breakfast, Addy watches her favorite movie or helps me stir stuff. My husband wakes up, usually to the smell of food. My Saturday mornings are very normal.

Sometimes normal is good. Very good.

Saturday mornings, I pour out my love for my family into blueberry pancake batter and crackling bacon... the LOVE that I wish I had shown that time that I yelled at my daughter, the FOCUS that I wish I could give my newborn even when his older sister needs a lot of attention, the WARMTH that I wish my husband got from me when he was trying to be romantic and I was too exhausted from pouring out to our kids to feel I had anything left to give. I cook away the week, make food we all like, all can take part in the making and definitely can take part in the eating. And, ah, as the gorgeous berry butter is melting on my lemon-zested pugliese french toast sprinkled with powdered sugar (I feel my waistline increasing just writing the description!), so I can feel the trials of the past week just melt away. I get a moment to savor life and thank God for my many blessings.

I LOVE Saturday mornings! (big sigh) So, dear family of mine, please know I love you with all my heart and am thankful for you EVERYday of the week (Sunday through Friday included).

My breakfast favorites:
  • Orange Juice: too expensive to buy for everyday consumption, but great for a once a week treat. 
  • Good ol' fashioned Bisquick pancakes with fresh or frozen blueberries added
  • BACON (Hey it's Saturday!)
  • French Toast as only the Pioneer Woman can do it... Had it for the first time and it is heaven here on earth http://thepioneerwoman.com/cooking/2011/07/french-toast-with-berry-butter/
  • Egg Scramble: I throw 4 eggs, some milk... like 1/4 cup, a tsp or so of Mediterranean seasoning blend from McCormick, and dice up whatever lunch meat my husband has left from his week of sandwiches (usually ham or turkey) into a bowl, wisk it a little and put into a medium heat pan. After the eggs are just about cooked through I add some shredded monterrey jack cheese and flip it all around to distribute the cheese and melt it. Yummy. Lots of room for yummy variations with scrambled eggs and a great place to put left-over meat.
  • Quiche: I like mine with Fresh Basil, portobello mushrooms, onions... I will have to pull out that recipe and post it. It is yummy!
  • Breakfast Burrito: I do scrambled eggs, a bag of frozen potatoes o'brien, bacon (or whatever I have on hand), monterey jack cheese, and taco sauce. 
So, since my camera apparently never works on Saturday mornings, here is a picture of breakfast from Addy's 3rd birthday. Nothing quite like Pancakes, bacon and eggs! (Notice the not-very-dinosauresque t-rex pancake. Addy loved it even though you probably can't tell what it is!)

    Make it FUN for your Picky Preschooler:
    • Dinosaur sandwich cut-out: It's just a sandwich-sized piece of plastic that cuts dinosaurs into my dinosaur-loving child's sandwiches. I found it in the grocery store and thought it could be the stupidest and most useless kitchen tool I ever buy or it could be one of the best. It was one of the best. Never under-estimate how much children love FUN looking food. It is how I get Addy to eat a healthy tuna on whole wheat during the week and how i get her to eat a very fancy-looking and tasting french toast.
    • Loosen up Momma and let your preschooler help you. And, usually, if they made it, they will at least try it. You may have a mess to clean up afterwards, but, hey, its saturday! Making messes is FUN!... even if cleaning them is not. (And if you are anything like me, you make a mess in the kitchen anyways)
    • Let your child tell you what shape pancake he/she wants. You may not be an artist especially with a large spoon and batter, but fortunately for you, your child has an imagination bigger than your lack of ability to make a t-rex shaped pancake. They will see it anyways.
    • Burrito Power: I have found that if I stick it in a burrito, Addy will eat it. She doesn't even look inside unless I get bold and stick something she really hates in it. (I apply this rule to fish taco night too, adults have tacos, while addy's soft taco is rolled like a burrito... Yep! She eats the fish!)
    • Um... and as for kid-ified quiche, I am not sure quiche can be made kid-friendly??? At least I haven't figured that one out. Bacon helps though, bacon always help make something good. Let me know if you know a way to make kids love quiche!

    Here's to Saturday, Friends! And here's to you having a blessed one!
    Amanda

    Cloth Diapering: If you only knew what other cloth diaperers know...

    I think it may have been a tight budget combined with a body full of nesting hormones that caused me to look into cloth diapering. I only had one friend (a now distant friend from college) that I knew of that CD'd (cd=cloth diaper from now on). While researching CDs, I came across the facts that each baby puts about 6,000 diapers into land fills in their first 2 years of life. I don't consider myself a "green" fanatic, but the idea of 6,000 poo-filled diapers times the number of babies in the U.S. sitting in a land fill is kind of a nasty thought! That thought combined with the money saving numbers, were all I needed to convince me to try it out. By the way, the average person spends about $1600 on diapers alone per child assuming all children potty train at the magical age of 2 and never need a diaper again (and since I am still in the middle of potty-training my almost 3 year old, to that I say HA!). This number-cruncher added up what she thought she would need to be successful in her CDing endeavor and came up with $450 (which is just my number, depending on how you CD, this number could be less or more) I also decided that since I am already washing diapers, why not go all natural and wash homemade wipes as well? So, I get to live with the satisfaction of adding $40-60 to this homemaker's monthly savings and the feeling that I am helping out the planet.

    To help you out, if you are considering CDing, I made my own list of pros and cons that I have discovered thus far. Also, I provided you with some links to some of the sites that helped me in my research.

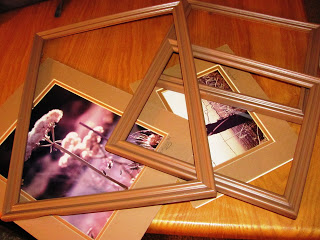
    Jedidiah sporting a Thirsties Duo wrap cover.


    PROS:
    1. Money Savings! Oh and I forgot to mention: they can be re-used for each baby. The more babies you have the more you save. Also, people buy used CDs, so if you only want one baby... sell them when you are done! 
    2. The feeling of doing something good for the planet. I seriously feel REALLY good about CDing.
    3. I have yet to have a diaper blow-out and only had one diaper leak on me. For you first-time preggos: maybe my kids are just poo-machines, but diapers blow out A LOT! I tried Pampers, Huggies, Luvs and quite a few off-brands and could never find a diaper that prevented this entirely... that is, until I tried CLOTH DIAPERS. I HATE changing clothes as often as I diaper. So, maybe I have more laundry in diapers, but I have less laundry in stained clothes. This makes me HAPPY!
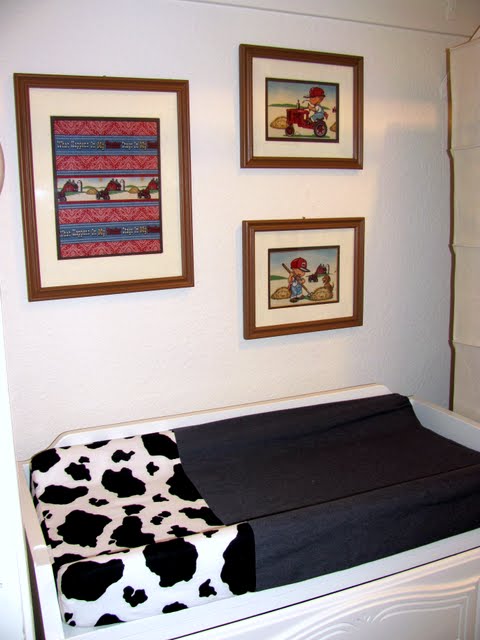
    4. Cloth diapers are CUTE! Yep, that's right... no more nasty plastic pants that your grandma used on her babies. CDs come in all kinds of different prints and colors. This also makes me very happy. I think diaper butts are cute and I love me a picture of my baby in just a diaper, but now imagine a cow print diaper butt or sailor print or bright blue or kangaroo print or... I think you get the idea. Sorry, Huggies, your expensive, limited edition, denim print disposables fail to impress a CDing mom!
    5. Now I am not here yet, but it is my understanding that CD'd babies potty train easier and faster. Hey, it's worth a shot! (and Puh-lease, Lord, let it be so!)
    6. Snappi's. You don't have to use scary diaper pins anymore. Snappi's are fast and easy to use, and, because of how they go on, they can't accidentally come in contact with your baby's skin.
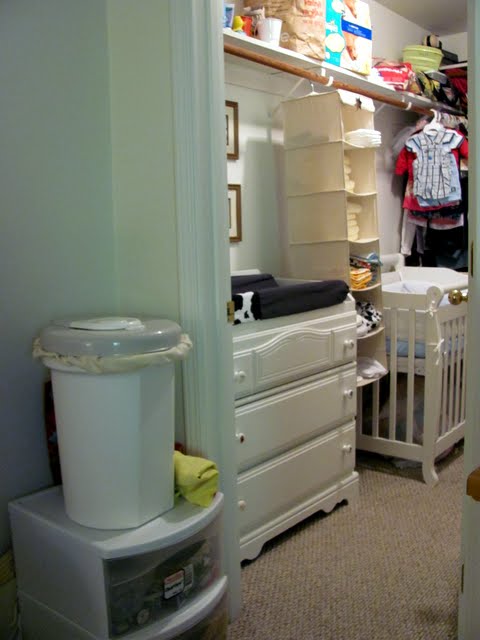
    7. Breastfed-only poop doesn't even need to be rinsed out. I stick my pre-folds into a diaper pail lined with a PUL fabric pail liner (same leak-proof, smell-proof fabric used for most diaper covers). I wash my prefolds in hot water and dry them in dryer and haven't had a stain or noticed a smell yet. (Though I am aware, once we start solid foods, I will be changing my system.)
    8. Toilet-attachable spray nozzle. When we do get to solids, I can spray the poo directly into the toilet. This has been my sanity-keeper with my potty-training daughter.
    9. Less diaper rash. No harsh chemicals and they seem to "breathe" better which makes for an overall healthier heiney.
    10. Doesn't add much time onto diapering. (Same amount of time to put on a prefold as a regular diaper and maybe a couple extra seconds to put the diaper cover on? But if you use all-in-ones, there wouldn't be any extra time added)
    11. Different companies offer trial run deals. If you end up hating it, you can send them back and get your money back. Or you can do like I did, commit to trying it out for one size and just get enough for that size. I hardly had anything to buy because my baby shower took care of almost everything I needed. Score!
    12. No weird or harsh chemicals on your baby's precious bum. Like seriously, how do disposables get all that liquid to absorb?!? Have you ever seen the insides of a disposable and then poured liquid into it?... It's weird and so not natural! (Okay, and maybe i am a little weird because, yes, I've tried it)


    CONS:
    1. You will need to do laundry every 2-3 days. (diaper services are an option, though they will cost you about the money you save going cloth).
    2. Cloth diapers require special detergent (though not necessarily more expensive depending on what you use)
    3. For you mom's who swear by the purple desitin or butt paste for diaper rash, these are not an option. Special diaper rash cream must be used. (petroleum based creams get into CDs and affect absorbency). Not too hard to find it, but I am one of those mom's who swear by the aforementioned products. The non-petroleum products have not been as fast at working in my experience. I have heard you can use diaper liners to protect your diapers while using these products, but have not tried it for myself.
    4. Maybe a funny con, but seriously, the diaper butt is HUGE! My son requires a size larger in onesies and jeans to accomodate his large diaper rump. I am sure as he grows larger his butt will look more proportional, but for now it looks a bit silly to me. To give you an idea, they are about the size of 2 disposables put together.
    5. Most people have no experience with CDs. I can imagine child care workers and babysitters that just simply won't CD your child. Most people are open (and curious) but it can be hard to give a crash course on the angel fold while trying to get to dinner appointment. My solution was to get a couple all-in-one CDs (they work just like a regular disposable except that you don't throw them away).

    Best wishes in your diapering journey!
    Amanda


    Links:

    http://www.realdiaperassociation.org/diaperfacts.php If you want all the cloth diaper facts, here they are!

    www.diaperjunction.com I have had a great experience getting diapers from them. In my research, they have the best prices, are the easiest to obtain free-shipping from, and have the largest selection. Also, if going with prefolds, their diaper-rite prefolds are the cheapest and work great! Scroll down to their "Information" section and look at their articles. They have a list of definitions and some great "how-to's" for those who have no clue about CDing.

    http://allaboutclothdiapers.com/ A great cloth diaper product review site.

    http://handmadebyrita.blogspot.com/ For you DIYers, here's a blog with some great FREE patterns for making your own cloth diapers.

    Nursery Wall Art on a Budget

    We rent our apartment, therefore we cannot paint or wallpaper our apartment. But when a women is nesting, Lord knows, she wants to DECORATE! I want a cute nursery, but don't have much money or much liberty living in a rental. My simple solution was to add some wall art. I went down to my local thrift store and found some framed photographs from the 1980's (and they looked like it too!). But the frames worked and the mattes were good. I found 3 matching frames for $8.00.                 

    The frames taken apart and already spray painted. If the lovely clerk from the thrift store happens to come across this... I apologize for destroying the art work. (The clerk was horrified that I would throw out the picture and reuse the frames... but what are you gonna do?!)

    ...As a brief aside, my church just opened its thrift store, City Thrift in Lodi, CA. All profits from store go to feeding those in need as well as into our women and children home and young men home in the process of being built. I say this to say that if you are in the area, consider taking your donations and doing your shopping at City Thrift, and, if not, consider supporting a local non-profit thrift store that gives back to your community. And, as an added bonus, they are often cheaper.

    Okay, so back to the project...

    I found a cute farmer boy fabric at Walmart to go with my farm-themed nursery. The print was just the right size for my frames (something to keep in mind should you choose to put fabric in your frames.) Another option I considered was using the wallpaper border from the nursery set I fell in love with. You might not be able to put wallpaper on the walls in your apartment, but who says you can't put it in a picture frame?!

    Finding frames and finding what I wanted to put in them was the biggest part of the battle. Once you do that you are ready to tackle the project!

    Supplies:
    • frames with mattes
    • fabric, wallpaper, or picture
    • spray paint for frames
    • acrylic paint for mattes (I recommend against using "Apple Barrel" brand for this project. While cheap, they seem more "watery" to me. Not best when painting paper product like a matte. I find Folk Art or Delta brands work best)
    • small sponge brush
    • Disposable pallette paper (or for the "non-painters" like me, wax paper does the trick)
    • Cup with water
    • Work surface and something to paint on... i.e. keep your table paint free. (I used paper towels, but paper towels are capable of bleeding, so if you are super worried... try wax paper.)
    • double sided tape or photo splits
    • scissors
    Got my supplies together. Notice the the sun-fading on the matte. Super old, but it totally still worked!
    Step 1: Take apart frames and spray paint the frame.


    Step 2: Paint your matte(s). You will not want to get too much water on your sponge as these are paper product. It should "warp" just a bit. But as the paint dries, the matte will go back to its original flatness.

    Be sure to paint the same direction... could just be my own "particularness" but I think it looks better, not to mention pro.
    Notice how my brush strokes all run in the same direction, even around the corner.
    Allow the paint to dry completely. It really depends on how many coats you put on, but this should only take a couple hours.
    My very sophicated and high-tech acryllic paint drying station.

    Step 3: Cut out fabric and attach to matte (the bottom matte if using two or more). To attach, I used photo splits (double sided tape works the same) and placed them on the back side of the matte close to the inner corners. Four did the trick for the smaller frames and six worked for the larger frame. Lay your fabric section on a flat surface and press your matte sticky side down onto the fabric exactly as you want it to appear in your frame.
    Step 4: Put the pictures back together in their frames (minus the old picture, of course).

    All done!

    My favorite picture. Love that I am having a baby boy!

    Total Cost:
    • Frames: $8
    • 1/2 yd. of fabric: $1.50
    • 2 acryllic paint colors: $3
    • Paint sponge brush: $1
    • Spray Paint: $3
    I had everything else on hand. So my grand total was: $16.50 for 3 double-matted frames. Pretty sure buying some baby wall art would have cost me at least $40 at the cheapest of stores and I managed to get some color into my baby's room for less than a gallon of paint. Sa-WEET!