Boys, Birthdays, and Bow Ties

I'm back! And so is Made Monday! Even though I didn't technically go anywhere for vacation, I certainly feel refreshed and focused. Plus I got to spend time with my family and even the husband. We had 3 "Daddy Home Days" as Addy would call them. And by the way, less than 3 months remain till my husband graduates from his program! Yee! I am excited. And ready!
Anyways... now, about this Made Monday post...
I had finally gotten around to working my budget. It's not pretty. This happened to coincide with my son's 1st birthday. Needless to say, I had no money to buy him a birthday outfit. Which is okay. It's not necessary. But seriously, all he has is hand-me-downs. And deep down in this mother heart of mine I really wanted to do something special.
If you ever find yourself wanting to deck your little boy out in all manner of cuteness but have zero dollars to do this with, I have 5 words for you:
Make. Him. A. Bow. Tie.
(Or: Tell. One. Of. His. Grandmas. Also five words, and this will most likely do the trick too.)
All you need is 20-50 minutes of time (depending on your sewing skill level), scrap fabric (I used a hand-me-down shirt that was too stained to be worn as a shirt), scrap interfacing, about a foot of elastic, and thread.
Here's the instructions in pictures (I will add some written out ones with more detail after the jump.)

1. Find fabric. You will need to determine the size you want your bow tie and add a 1/2" seam allowance to the length and width measurements.
My measurements:
- Bow Tie: 4 1/2" x 3" (2 pieces needed)
- Hold-Together piece: 1 1/2 x 6 (I cut this on the bias so my bow tie would have some added visual interest with a change in the direction of the print. By the way, I have no idea what this piece of fabric is technically called, so I made up a word for it: hold-together piece. I know, super sophisticated and technical, right?! Ha!)
- Interfacing: 4 x 2 1/2 (2 pieces needed)
- Elastic: 13"
3. Add interfacing to both sides of bow tie.
4. Turn the bow tie and the hold-together piece right-side out. Iron them nice and flat. To get the tip of the bow tie pointy, try using a pencil to push the tips out. Sew the opening in the bow tie piece closed. Turn hold together piece inside out. Iron it so that the seam is in the middle of one side.
5. Pinch bow tie in the middle (see picture).
6. Add hold together piece. Wrap once around the middle of the bow tie and pull tight.
7. Slip a strip of elastic through the hold together piece on the back side of the bow tie.
8. Sew the hold together piece. Use the zipper foot on your sewing machine to get your seam line as close to the bow tie as possible. Trim extra fabric. Try the bow tie on your handsome model with a collared shirt on to get the elastic measurements just right. (Note: my elastic stretches to get around his head and into place on the collar, but it is NOT stretching when in place. Comfort is very important to keep in mind... especially if you want your child to actually wear it.) Sew elastic together. I added a few free hand stitches to keep the bow tie and elastic from moving.
DONE!
This was SERIOUSLY easy and would require only the most basic of sewing knowledge. Definitely a great beginner project.
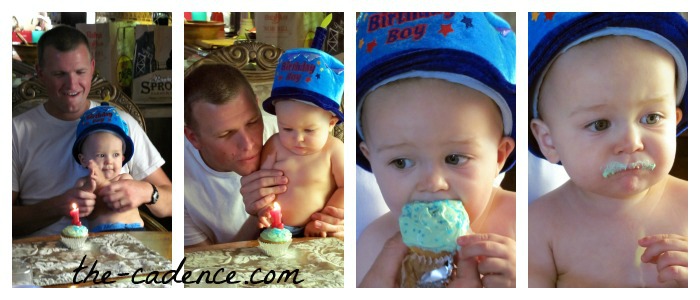
My handsome boy was dedicated two Sunday's ago. Immediately after church, we celebrated his first birthday with family. I may not have had a penny to use to buy him a strapping boy outfit, but I totally made it work. I think he looked adorable in his hand-me-down outfit topped off by the home-made bow tie and the grandma-bought white dress shoes.
Some pictures from the day:


- I am a big fan of baby dedications. Not the event, but the standing before God and witnesses and committing out loud to trust God with my child and to raise my child to know God. It's a powerful thing!
- My sissy's in blue and my sister-in-law is in the picture with both my kids, aren't they beautiful?! God blessed me with two awesome sisters!
- I also had no money for decorations, but I rigged up a happy birthday banner from 8x6 triangle pieces of leftover fabric, free-hand cut letters out of scrapbook paper and used modge podge to glue the paper to the fabric. I ripped a long strip of white fabric and zig-zag stitched the whole thing together. It's hard to tell in the bad lighting, but I think it turned out cute.


Have you ever had next to $0 to celebrate a milestone? How did you make it work?
We are off to Addy's very first day of swimming lessons today. Tomorrow, I have a something very personal to share with you all. I am excited about it, so do come back :)
Till Then...
xo
Amanda